
Plumbing fixtures are devices or apparatuses connected to a plumbing system to perform specific functions, such as delivering water or draining wastewater. Examples of plumbing fixtures include faucets, sinks, toilets, showers, bathtubs, bidets, and urinals. A professional Plumber from Dandenong must install these fixtures as they are made from various materials, including ceramic, porcelain, metal, or plastic; they can be designed in various styles to suit different tastes and needs and need to be handled very carefully. At times they even cost a fortune. Plumbing fixtures are an essential part of any plumbing system, as they allow for the safe and efficient delivery and removal of water and waste.
Reasons for the Fixtures to Get Loosened With Time
Plumbing fixtures can loosen over time due to a combination of factors, including wear and tear, changes in temperature, settling of the building, and improper installation or maintenance.
1. Wear and Tear – Frequent use of a plumbing fixture, such as turning a faucet on and off, can cause the nuts, bolts, or screws that hold the fixture in place to become loose. Over time, this can lead to a wobbly or unstable fixture that may leak or detach from its mount.
2. Changes in Temperature – Changes in temperature can cause materials to expand or contract slightly. Over time, this expansion and contraction can cause metal or plastic materials to loosen slightly, contributing to the loosening of plumbing fixtures.
3. Settling of the Building – As a building settles over time, the pipes and plumbing fixtures can shift slightly, causing them to become loose. This settling can be due to the natural settling of the soil, changes in the moisture content of the ground, or other factors.
4. Improper Installation or Maintenance – If a plumbing fixture is not properly installed or maintained, it may become loose more quickly. For example, if a fixture is not secured tightly enough during installation, it may become loose more quickly over time. Similarly, if a fixture is not properly maintained, such as if it is not tightened periodically, it may become loose more quickly.
5. Vibration – Plumbing fixtures near vibrating equipment, such as washing machines or HVAC units, may become loose over time due to constant shaking or vibration. This can cause the nuts, bolts, or screws holding the fixture in place to become loose.
6. Water Quality – The quality of the water flowing through the plumbing system can also affect the fixtures. Water high in minerals, such as calcium or magnesium, can cause a buildup of scale on the inside of the pipes and fixtures, eventually leading to corrosion and loosening of fittings.
7. Chemical Exposure – Exposure to certain chemicals can also cause plumbing fixtures to become loose. For example, exposure to acidic or caustic cleaners can cause corrosion or deterioration of the materials holding the fixture in place.
8. Ageing – Plumbing fixtures can become more prone to loosening as they age. Materials may weaken or deteriorate over time, causing fittings to become loose or break.
9. Incorrect Use – Incorrect use of a plumbing fixture can also cause it to become loose. For example, if a faucet is consistently turned too hard or a handle is pulled too aggressively, the nuts, bolts, or screws holding the fixture in place can become loose over time.
If you notice a plumbing fixture has become loose, it’s important to have it fixed promptly by a professional plumber from Dandenong to prevent further damage or leaks.
Installation of the Fixtures Without Damaging Them
Proper installation is critical to ensure that plumbing fixtures are installed securely and will function properly for a long time. Here are some general steps that professional plumbers from Glen Waverley follow for installing plumbing fixtures without damaging them –
1. Necessary Tools and Materials – Gather all the tools and materials needed for the installation, including the fixture, mounting hardware or brackets, sealing materials such as plumber’s putty or Teflon tape, and appropriate tools such as a wrench, screwdriver, or pliers.
2. Use the Right Tools – Use the right tools for the job. For example, use a basin wrench for tightening nuts in tight spaces and an adjustable wrench for larger fittings. Using the wrong tool can lead to stripped threads or other damage to the fixtures.
3. Turning the Water Supply Off – Turning the water supply off to the area where the fixture will be installed. This shuts off the main water supply during the fixture installation in a new location or if there is no nearby shutoff valve.
4. Manufacturer’s Instructions – Read the manufacturer’s instructions carefully and follow them closely. These instructions will provide specific guidance on installing the fixture correctly, including any special steps or precautions that need to be taken.
5. Clean and Dry Location – Ensure the installation location is clean, dry, and level. Use a level to ensure the fixture is installed straight and flush with its mounted surface.
6. Don’t Over-Tighten – Over-tightening can damage or crack the fixture. Follow the manufacturer’s instructions for torque specifications and use a torque wrench if necessary.
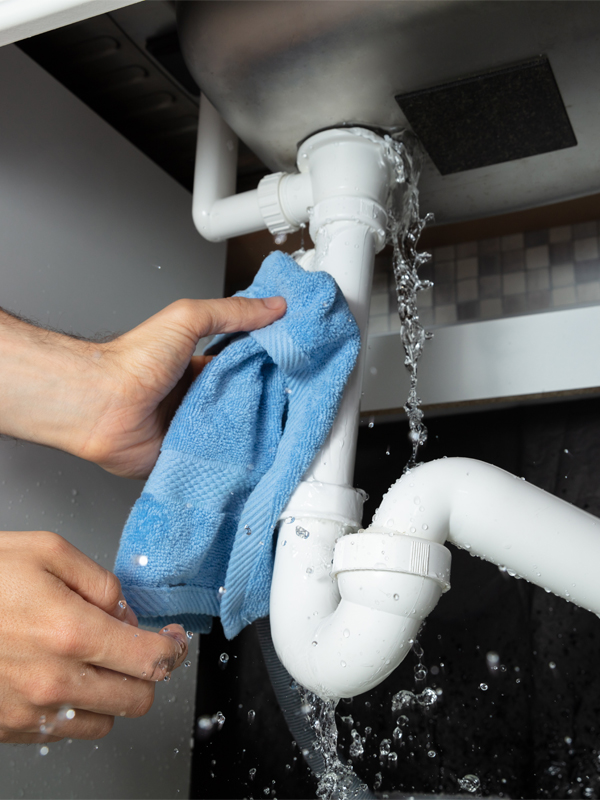
7. Protect the Finish – Plumbing fixtures are often made of delicate materials like porcelain, chrome, or brass, which can be easily scratched or damaged. Be sure to protect the fixture’s finish by wrapping it with a soft cloth or towel when using tools, and avoid using abrasive cleaners or scouring pads.
8. Sealing Materials – Apply any sealing materials as directed by the manufacturer. Plumber’s putty, for example, may be needed to seal around the base of a sink or faucet to prevent leaks.
9. Secure the Fixture – Secure the fixture to its mounting location using the appropriate hardware. Be careful not to over-tighten the bolts, screws, or nuts, as this can cause damage or cracking to the fixture.
10. Plumbing Lines – Connect any necessary plumbing lines or hoses to the fixture, ensuring they are properly secured and sealed.
11. Turning the Water Supply On – Turn the water supply back on and test the fixture for leaks or other issues.
12. Check for leaks – After installation, test the fixture by running water and inspecting all connections and fittings for drips or leaks. Even a small leak can cause damage over time, so addressing any issues promptly is important.
13. Don’t force it – If something doesn’t seem to fit or isn’t lining up properly, don’t force it. Forcing a fixture into place can cause damage to both the fixture and the surrounding plumbing. Assess the situation carefully before proceeding.
14. Use proper support – Make sure the fixture is properly supported and secured. A wobbly fixture can cause leaks or damage to the surrounding area. Use brackets or other support systems as needed.
By following these steps and taking care during the installation process, you can help ensure that your plumbing fixtures are installed correctly and will function properly without any damage. If you’re uncomfortable with plumbing work, consulting and summoning a licensed Plumber From Glen Waverley is always best to ensure the installation is done safely and correctly.
The Final Words
Professionals from Doyle Plumbing Group can help ensure that your plumbing fixtures are installed safely and securely without causing any damage. Always remember, if you’re not confident in installing the fixture yourself, it’s always best to consult a licensed plumber.


Leave a Reply